News

Jan 16, 2018 • 4 min read

Topic
Author
In This Blog
Today I’m writing about Atlassian Connect, the Atlassian Cloud platform for creating and developing add-ons. Creating a server-based add-on
If you’re writing a server-based add-on for Jira or Confluence you need to create a JAR file in Java source code.
If you’re distributing your add-on via Atlassian Marketplace, upload the completed JAR file to Atlassian Marketplace.
Atlassian users all over the world can download this JAR file and install it in their own Jira or Confluence.
Creating a cloud-based add-on
If you are developing an add-on for the cloud, you need to set this up as a web service rather than a JAR file.
Register the URL of your website in the Atlassian Marketplace. This will then communicate with applications in Atlassian Cloud (Jira, Confluence etc.) via REST APIs and webhooks.
If you are going to publish add-ons to Marketplace, they must be accessible by Atlassian users around the world 24 hours a day, 365 days a year.
Serverless architecture
Running a web service that is continuously available and accessible is easier said than done, especially for engineers who have previously focused on server-based add-ons. The hurdles involved here can be quite challenging.
If this is the case, engineers should focus on developing their applications using serverless architecture. Fortunately, Atlassian Connect’s framework is totally compatible with serverless architecture, so with minimum configuration, you can write cloud add-ons (known as “static” add-ons) just by creating HTML and JSON files.
If you configure up a static file, all you have to do is put the file on the web server. You don’t have to worry about extending the application server or tuning the database server.
Creating a static add-on in Bitbucket Cloud
In this blog I’ll show you how to create an add-on for Bitbucket Cloud using the Bitbucket Cloud function.
First of all, you need to configure your website. You can refer to “Publishing a Website on Bitbucket Cloud” to set up your static file.
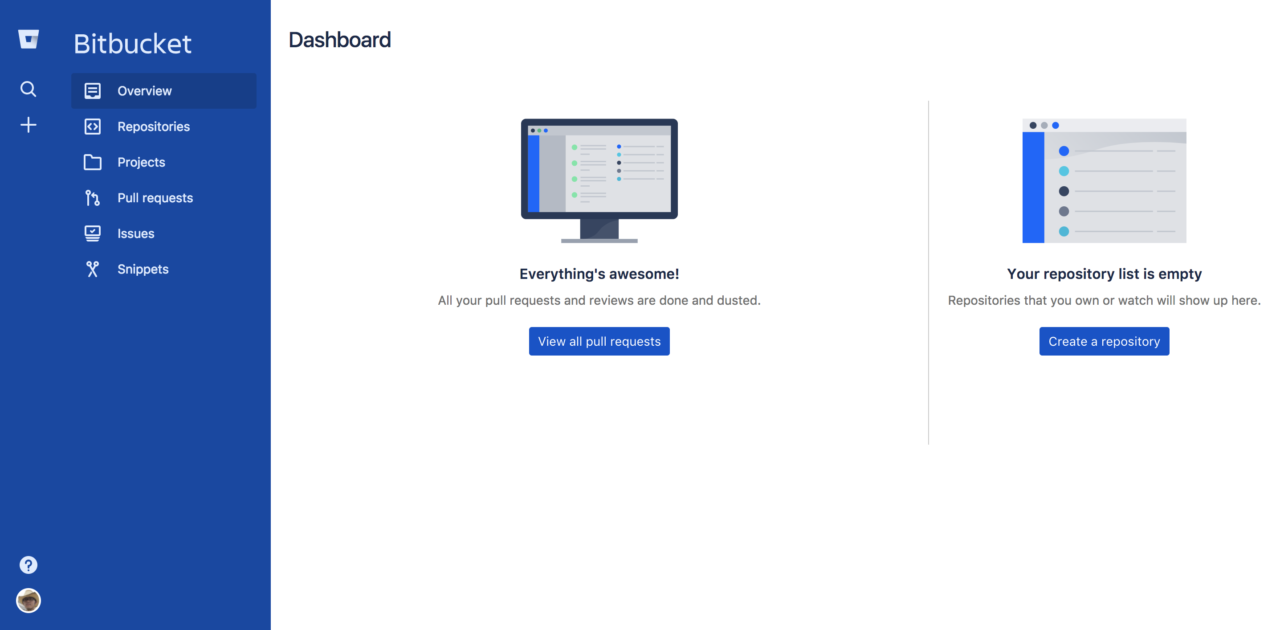
Creating a repository
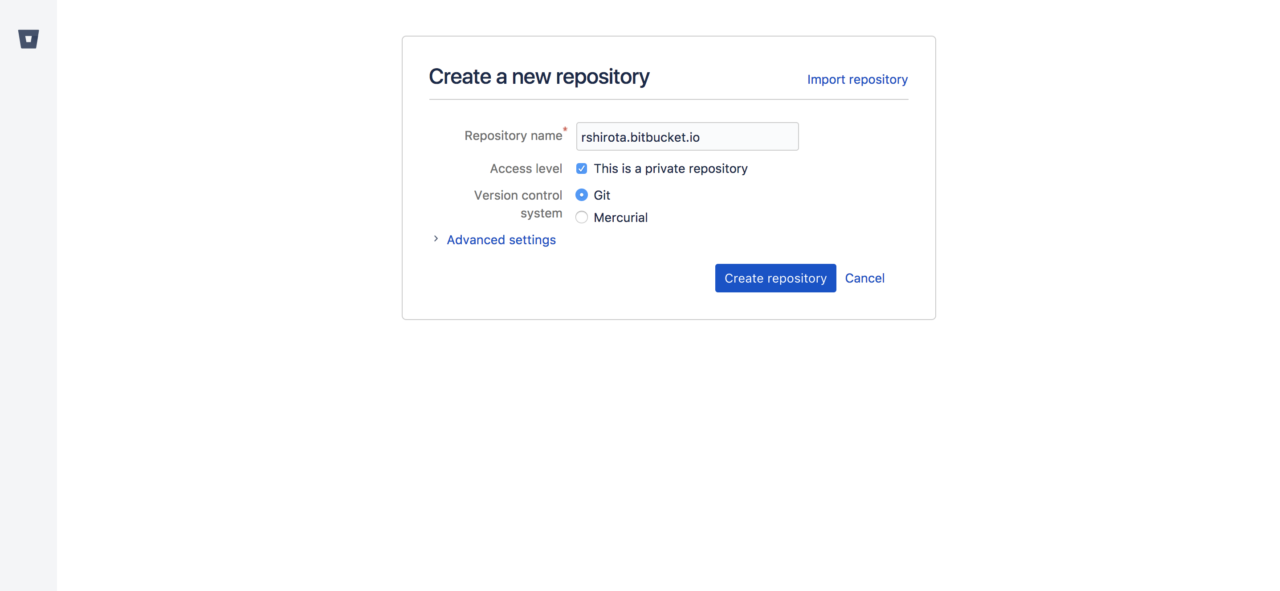
Create a repository at https://bitbucket.org/
The repository name should be “accountname.bitbucket.io.”
Clone the repository to your local system. Create an index.html file, then commit and push the file to Bitbucket.
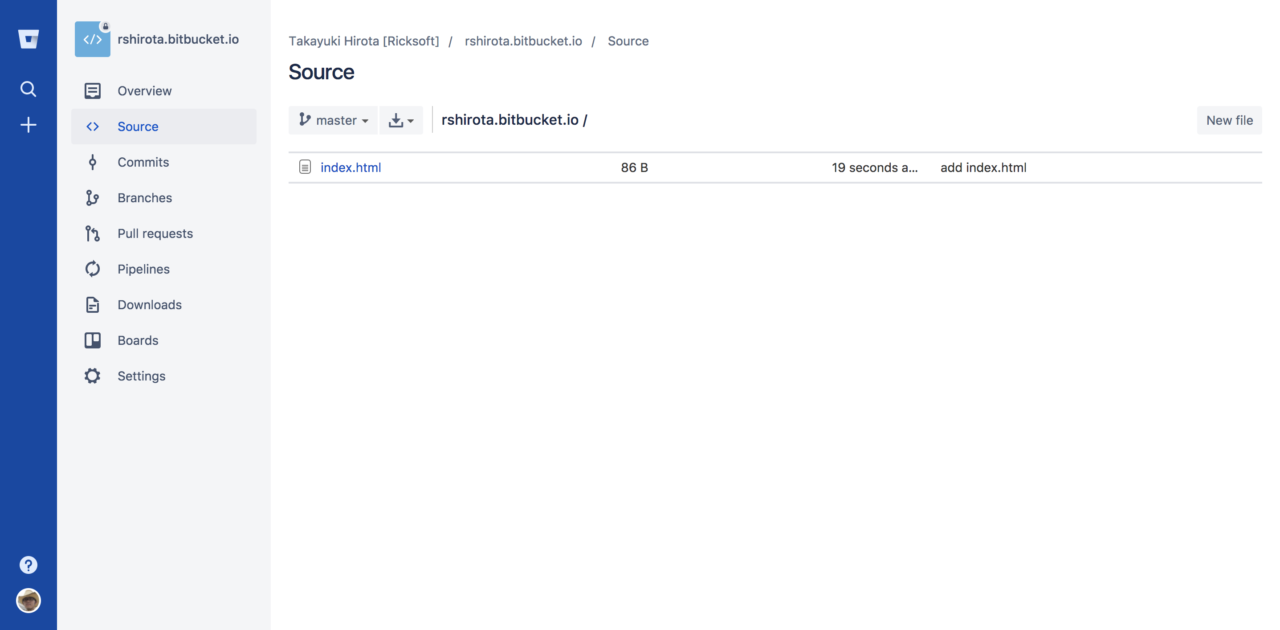
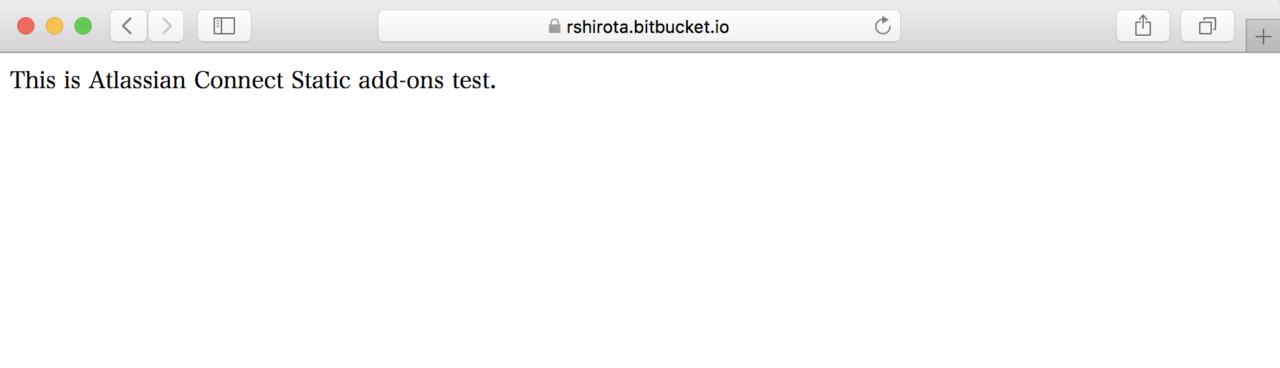
Access the file https://accountname.bitbucket.io/index.html in your browser, and check this screen is displayed.
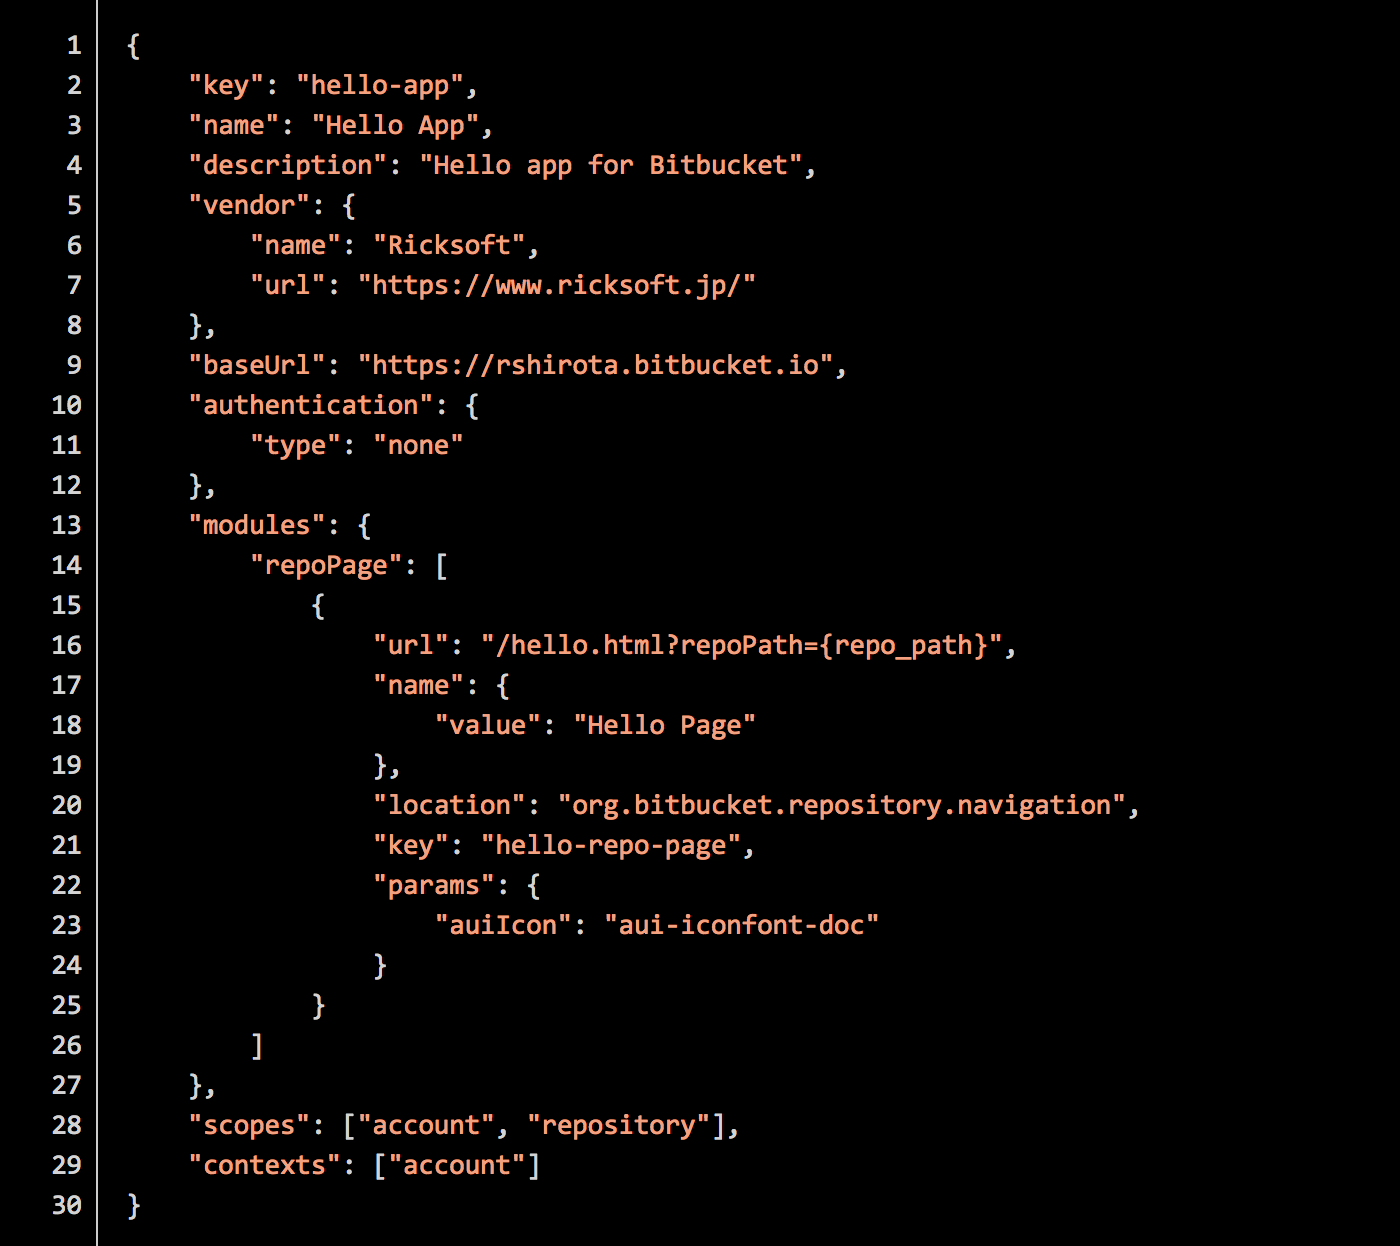
Creating app descriptors
Create an app descriptor (corresponding to server-based atlassian-plugin.xml).
The following code adds a menu item to the repository screen sidebar using the Repo Page module, and displays the original page of the add-on.
HTML page files
“all.js” files effectively form the basis of the Atlassian Connect framework. “js” files are used for implementing a range of different client-side processes.
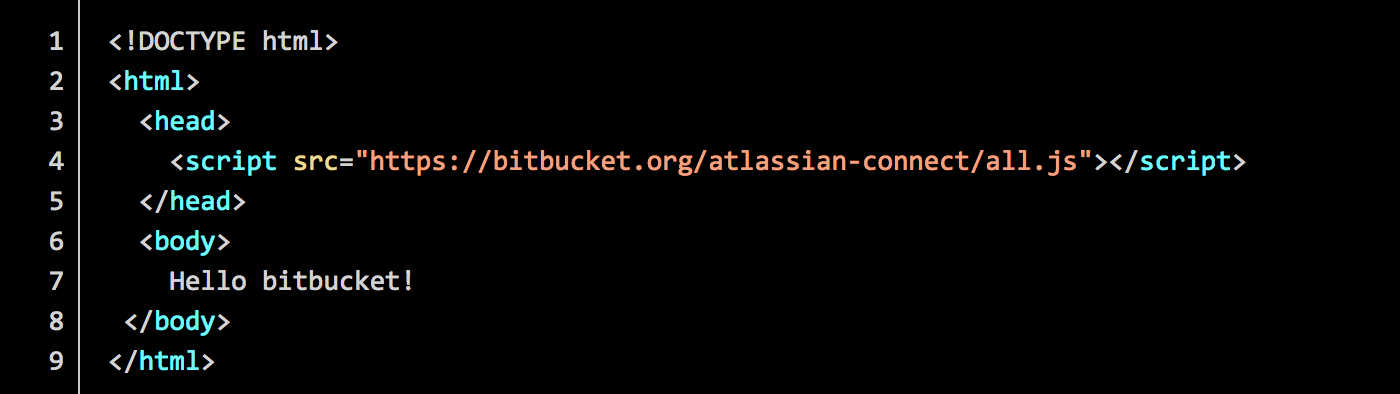
Commit and push the two files into the repository.
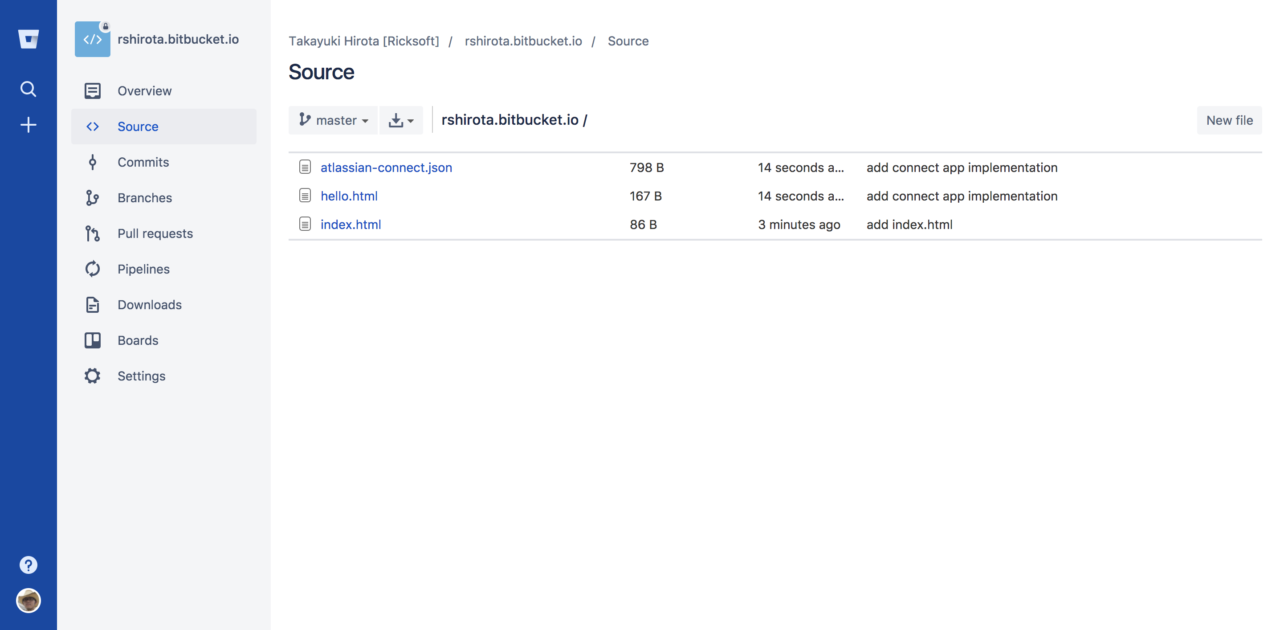
This concludes the description on how to implement an add-on.
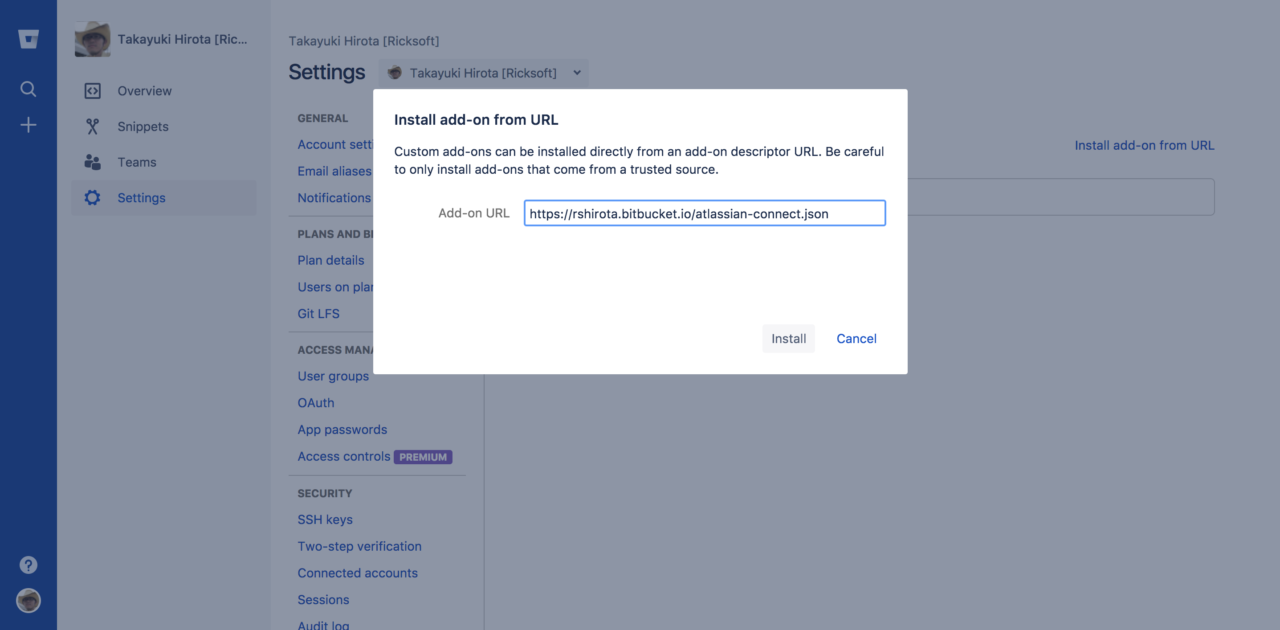
Installing add-ons In Bitbucket Settings > Manage Integration, specify the URL of the add-on and install.
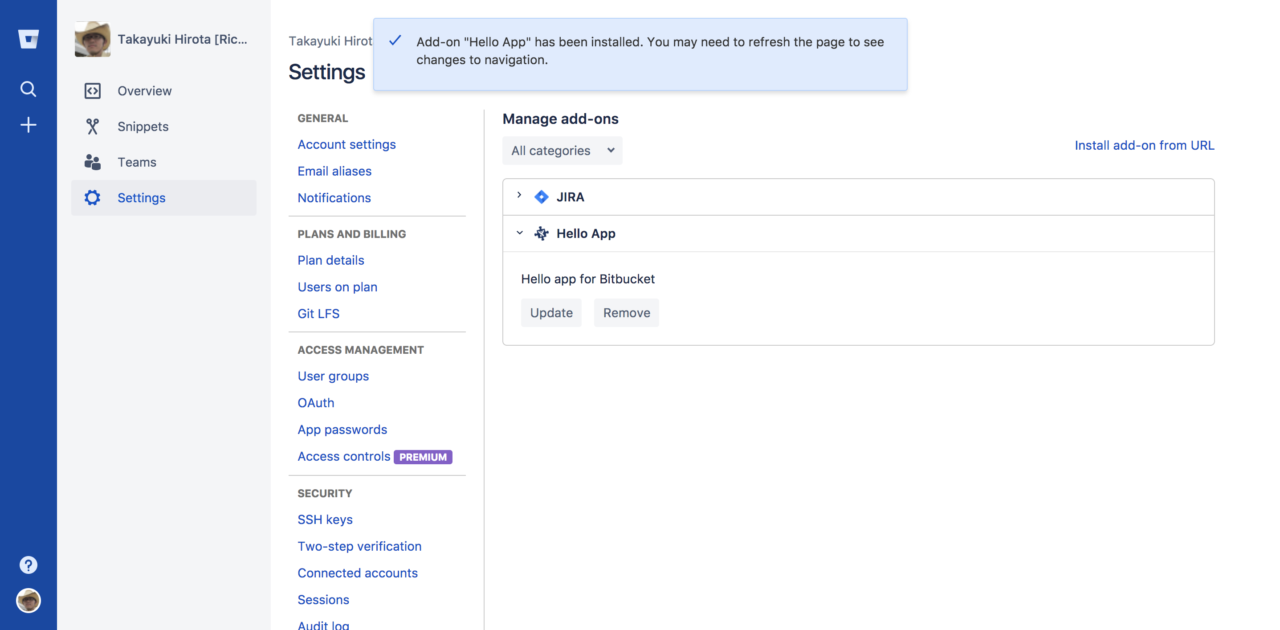
When the add-on has been successfully installed, it is displayed in the list of installed add-ons.
Verify operation The menu is displayed in the sidebar of the repository screen. Click on hello.html to display the file.

Conclusion
On this occasion we have created a simple static add-on. However, if you are creating a REST endpoint or hooking up an Atlassian Cloud event, you’ll need to do some work on the server side as well.
If you’re interested in finding out more, why not take a look at the AtlasCamp 2017 presentation (Atlassian Connect on Serverless Platforms: Low Cost Add – Ons | Atlassian) for some hints and tips on creating serverless Connect add-ons.
